Previous Lesson
Lesson Purpose:
Lesson Purpose:
- By the end of this lesson we should be able to create a LIDAR model on our robot.
- We should also be able to get functional and realistic sensor data from that model.
Lesson 5: Adding a LIDAR
In this lesson we will be starting from the model and plugin we made in Lesson 4. You can get those here, or you can follow along with your own model and plugin.
Right now we have a little rover we can move around and drive around our virtual worlds, but theres not much room to make smart programs around it. Without looking at the simulation we have no idea about anything with the state of the robot - and in the real world we want to be able to do more than just play with an RC Car, we want to make a robot. To do that, we need to start getting some simulated sensor data, so we can start making some decisions in our code. The sensor we are going to make for our robot is a LIDAR. This tutorial is going to be heavily based off of the one found here.
1. The LIDAR Model
Our rover doesn't have a LIDAR on it right now though. We need to mount the LIDAR onto it somewhere.
First things first, let's make a lidar.xacro sketching out the model, like below:
lidar.xacro
And now that we have our Lidar defined, lets attach it to our rover.
rover.xacro
|
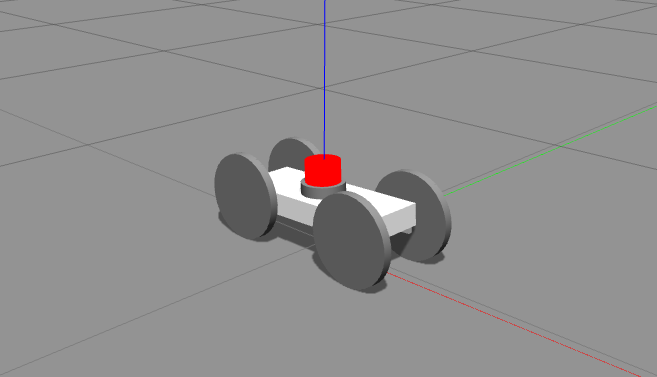
Now lets load up our rover, we should have our laser sensor up and attached to our rover (and not really a sensor yet, just a thing sitting there)
|
|
Now to make our actual laser, in the <gazebo reference="laz_rot"> block, add the following code in order to specify the type and functions of the sensor:
Code Editor
|
And now, when we boot up our rover with our new and improved .xacro we should see this:
|
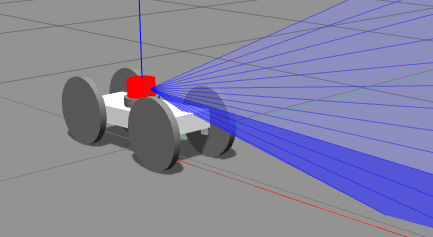
|
Lets see what our rover sees now.
Set up something in gazebo in our rover's line of sight, hit cntrl+t in gazebo to open the gazebo topics, look for the msgs.LaserScanStamped, and double click on our rover's laser topic. You should see something like this:
Set up something in gazebo in our rover's line of sight, hit cntrl+t in gazebo to open the gazebo topics, look for the msgs.LaserScanStamped, and double click on our rover's laser topic. You should see something like this:
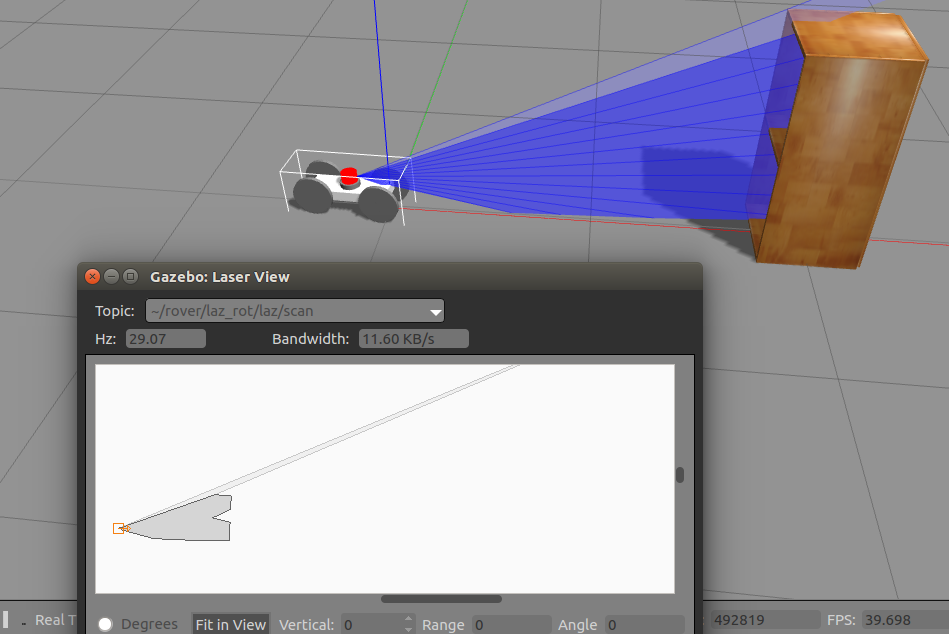
You'll notice that the rover has to sort of guess at the intermediate values in the scan, because the scanner we gave it has a kind of awful resolution. But that's still a lot of data we can use - unfortunately it is a bit unrealistic. Those values are perfect values for each laser, and most of the time sensors have noise, and usually they have a decent amount of it.
If we are gonna simulate a robot, we want to simulate the sensor noise too, because even if we have an algorithm for our robot that works perfectly, if it can't handle error we won't be able to use it. So lets add some noise to the sensor.
Under the <ray> tag of our sensor add the following code:
If we are gonna simulate a robot, we want to simulate the sensor noise too, because even if we have an algorithm for our robot that works perfectly, if it can't handle error we won't be able to use it. So lets add some noise to the sensor.
Under the <ray> tag of our sensor add the following code:
This will add error to our sensor in a gaussian distribution. We have the standard deviation set stupidly high right now just so that you can see the effect this will have on the sensor (in this case having a completely broken sensor)
|
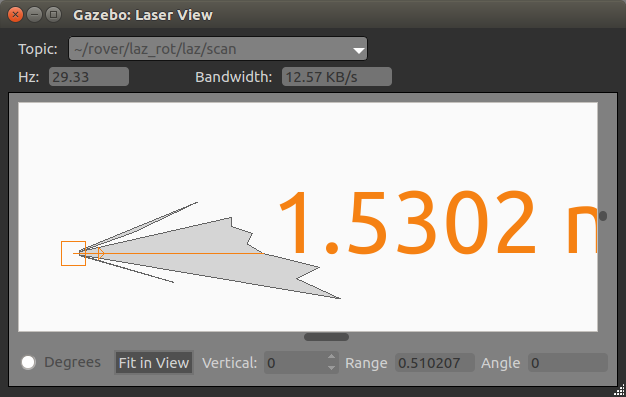
You should now get a sensor output like this (although it'll be oscillating and changing rapidly), when in a similar situation to above:
Which is a bit harsh. Unless your rover is in a dust storm on Mars, we probably will have a lot less noise than that. Now that we've seen what sensor noise can do, lets set our standard deviation to a reasonable amount, like 0.01. |
|
We've got a small problem though, we don't actually have access to the data in ROS right now. We need to write a sensor plugin for that -- Most of the sensors have prebuilt in plugins for them, but that doesn't really help you learn how to fully use Gazeebo if all you do is drop in black boxes, so we're gonna make our own.
Make a new *.cc file in your plugin folder for our sensor plugin. In our CMAKELIST.txt add:
add_library(laz_sensor_plugin plugins/PLUGINFILE.cc)
target_link_libraries(laz_sensor_plugin ${catkin_LIBRARIES} ${GAZEBO_LIBRARIES} ${roscpp_LIBRARIES} RayPlugin)
It should be set to compile now.
Now let's write some code, first we need to inherit from the sensor class baseclass:
Now lets access the data on each scan, change our OnNewLaserScans function to this:
(The important bit to notice is that we access the laser ranges by passing in the address of a vector of doubles into the Ranges() function of the sensor pointer)
(The important bit to notice is that we access the laser ranges by passing in the address of a vector of doubles into the Ranges() function of the sensor pointer)
But most laser sensors rotate, and we need to know the rotation to have useful data. This isn't so straightforward in Gazeebo's plugins, as sensor plugins don't directly have access to the model's state. So we're gonna have to do some jerry-rigging.
Add a new private physics::LinkPtr variable called _l and add the following code to the Load() and OnNewLaserScans() functions:
Add a new private physics::LinkPtr variable called _l and add the following code to the Load() and OnNewLaserScans() functions:
The sensor has a scoped name that includes its link and parent model name, so we get that, and prune it down to just the link name. From there we can get the world from the sensor (which stores the name of the world), and then use the world to get the model (from the sensor's model name), and then use the model to actually get the link that the sensor is stored in. From there we can actually use that to get the yaw.
Homework:
1. Spin that sensor
Modify your rover plugin to spin the LIDAR at a constant rate (bonus points if this is a controllable parameter that you can control with a ROS topic)
Homework Solution
2. Publish your data
Take the data you are currently gathering and publishing to the console, and publish that on a ROS topic.
And once you're done with that, congrats! You can make and simulate a robot in Gazeebo!